

Outdoor Patio Installation Guide for Homeowners
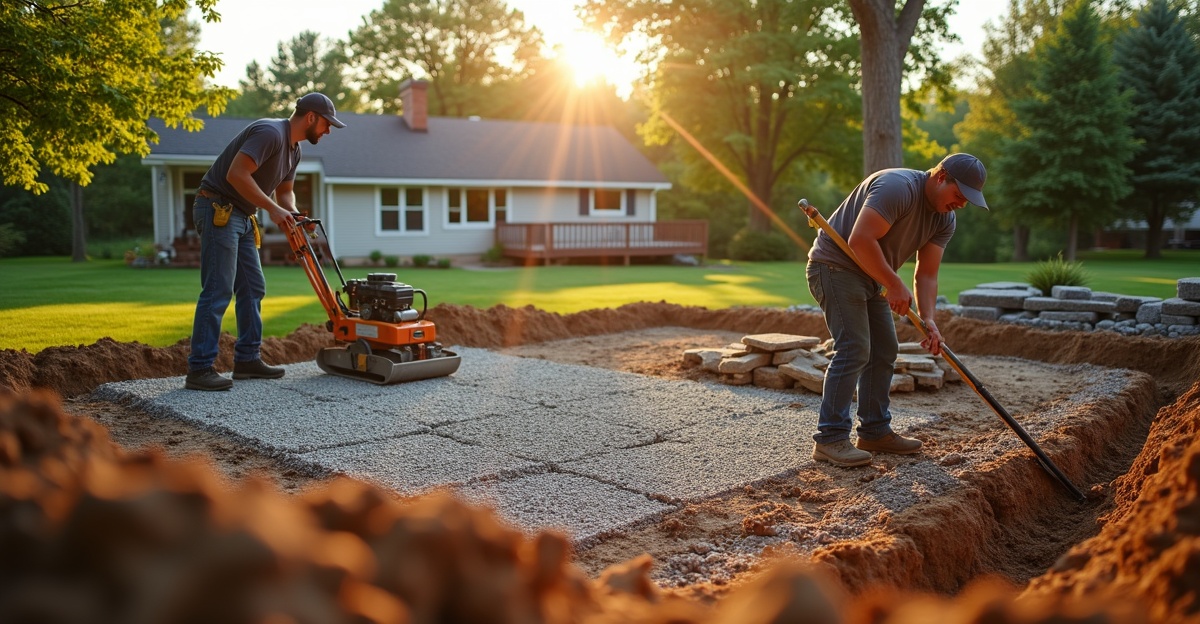
Outdoor patio installation in Minnesota demands careful planning, proper excavation, solid base preparation, and effective drainage control to handle heavy clay soils and repeated freeze–thaw cycles. In this Outdoor Patio Installation Guide for Homeowners, we explain each step of the process, compare material options, outline realistic timelines, break down cost drivers, and share what we recommend homeowners look for when hiring a qualified contractor.
Key Takeaways
- A quality patio starts with a detailed site evaluation, correct excavation depth, layered aggregate base installation, and thorough compaction. We rely on each of these steps to prevent settling and frost heave over time. Skipping any part increases the risk of failure.
- Proper drainage planning and grading away from the home protect the patio and the foundation. We make sure water flows away from structures to prevent standing water, surface shifting, and long-term structural damage.
- Material choice—concrete pavers, poured concrete, or natural stone—directly affects repair flexibility, maintenance demands, appearance, and long-term performance in Minnesota’s climate. We help homeowners weigh durability, cost, and serviceability before making a decision.
- Most patio projects take 1–3 weeks from start to finish. Layout complexity, soil conditions, site access, added features, and weather conditions all influence both the timeline and the final price.
- When evaluating patio contractors, we encourage homeowners to look for detailed written proposals, clear communication, proper licensing and insurance, and direct answers about base depth, compaction methods, and drainage strategy. Clear documentation and transparency lead to better results.
What to Expect From a Professional Outdoor Patio Installation
Outdoor patio installation involves far more than placing pavers or pouring concrete. A quality build in Shakopee and throughout Scott, Carver, Dakota, and Hennepin Counties requires planning, site evaluation, excavation, base preparation, drainage control, precise installation, detailed finishing, and a final walkthrough.
Every patio construction project starts with understanding the property. We assess slope, soil type, drainage patterns, and access to the backyard. Minnesota yards often include heavy clay soils, which hold water and expand when saturated. That means the structure beneath the patio matters just as much as the surface.
Homeowners often contact patio contractors after seeing issues elsewhere—sunken corners, uneven edges, standing water near the foundation, or patios that shift after one winter. Those problems usually trace back to shortcuts during base preparation or poor drainage planning.
A professional patio installation process sets expectations around:
- A clear scope of work
- Realistic timelines, often 1–3 weeks depending on size and weather
- Ongoing communication during construction
- Temporary site disruption from equipment and materials
Weather plays a role in every Minnesota project. Rain can saturate soils. Early frost can affect scheduling. We plan carefully, but we also stay realistic.
Common frustrations in the industry include vague estimates, constant change orders, messy job sites, and unfinished detail work. We avoid those pitfalls by defining the plan upfront and staying hands-on from the first meeting to the final walkthrough. Our approach centers on strong hardscape construction practices that support long-term performance, not just appearance.
How the Patio Installation Process Works in Minnesota’s Climate
A well-built custom outdoor patio follows a clear sequence. Each step serves a purpose, especially in a freeze–thaw climate.
Step-by-Step Patio Installation Process
Here’s how a typical project unfolds:
- Initial consultation and site evaluation: We measure slope, test soil firmness, review drainage patterns, and assess access for equipment. Proper evaluation prevents surprises later.
- Design planning: Through thoughtful outdoor living design, we shape a layout that fits the home and yard while managing water flow.
- Utility marking: Before digging, local utilities are marked to avoid service disruptions.
- Excavation: We remove soil to the correct depth based on soil type and intended load. Depth varies depending on conditions and patio use.
- Base preparation and compaction: We install layers of aggregate—often class 5—and firmly compact them. Compaction means mechanically compressing the material so it locks together and resists settling.
- Geotextile fabric (when needed): This stabilization layer separates soil from aggregate, reducing mixing and long-term movement.
- Grading and drainage setup: We slope the base away from the house to move water safely off the patio surface.
- Material installation: Pavers, concrete, or natural stone are set according to manufacturer and industry standards.
- Edging and restraints: Edge restraints keep pavers from spreading outward over time.
- Joint sand or sealing: Pavers receive joint sand to lock units together. Some surfaces may also be sealed where appropriate.
- Final walkthrough: We review the work with homeowners and address any remaining details.
Minnesota winters make this process critical. Frost heave occurs when water in the soil freezes, expands, and pushes materials upward. Without proper base depth, compaction, and drainage, patios can shift or crack after repeated freeze–thaw cycles.
Clay-heavy soils common in our area drain slowly and retain moisture. That reality affects excavation depth and base thickness. We account for those conditions from the start rather than reacting after the first winter.
Building a Patio That Lasts: Base, Drainage, and Frost Protection
Long-term performance depends more on what sits under the patio than what appears on top. A beautiful surface cannot compensate for a weak foundation.
Most patios in our region rely on a compacted aggregate base, often class 5. Thickness varies by soil condition and patio use. A lightly used seating area differs from a space supporting a hot tub or outdoor kitchen. We install aggregate in layers and compact each layer thoroughly. That step reduces future settling.
Drainage planning protects the patio and the home. We grade surfaces away from foundations and basement walls. Without proper slope, water can pool near the home and increase the risk of infiltration.
Poor drainage also leads to:
- Shifting and settling
- Standing water after rain
- Joint washout in paver systems
- Surface cracking in concrete
Minnesota weather can extend timelines. Heavy rain may delay excavation if soil becomes saturated. Early frost can impact finishing steps. We build contingency time into schedules and communicate changes clearly.
Shortcuts often show up within a year or two. A properly executed patio construction project minimizes movement and reduces maintenance needs over time. We focus on solid base work, consistent compaction, and correct grading because durability matters more than rushing to completion.
Choosing the Right Materials for a Custom Outdoor Patio
Material selection influences cost, appearance, maintenance, and long-term performance. Each option has strengths in a freeze–thaw climate.
Concrete Pavers
Concrete pavers form a flexible system. Individual units interlock, and joints allow slight movement without widespread cracking. If damage occurs, single pavers can be replaced without removing the entire patio.
With proper base and edge restraints, pavers perform well in Minnesota winters. Joint sand plays an important role by locking units together and reducing weed growth.
Maintenance includes occasional joint sand replenishment and periodic cleaning. Sealing remains optional depending on finish preference.
Poured Concrete and Natural Stone
Poured concrete often carries a lower upfront cost. However, large slabs are prone to cracking over time due to freeze–thaw cycles and soil movement. Control joints help guide cracking, but they do not eliminate it. Repairs can be visible and sometimes require larger section replacements.
Natural stone offers a premium, distinctive appearance. Each piece varies in shape and color. Installation requires precise leveling and a stable base to prevent movement. Skilled workmanship makes a noticeable difference here.
Material choice should reflect:
- Budget range
- Desired appearance
- Repair flexibility
- Long-term performance expectations
We review these factors during planning for a custom outdoor patio so the final selection fits the space and intended use.
Added features also affect material decisions. Integrating elements like landscape fire features or built-in seating requires coordinated structural planning from the start.
Realistic Timelines and Cost Drivers Homeowners Should Understand
Most outdoor patio installation projects fall within 1–3 weeks. Smaller, straightforward patios may finish sooner. Larger layouts with steps, walls, or integrated features require more time.
Several factors influence investment level and schedule:
- Size and complexity of layout
- Material selection (pavers, concrete, natural stone)
- Site access constraints such as fences or tight yards
- Demolition of existing patios
- Added steps, seat walls, fire features, or lighting
- Drainage improvements
- Soil conditions discovered during excavation
Weather also shapes timelines. Extended rain can slow excavation and compaction. Material lead times may shift schedules. Unexpected soil conditions sometimes require deeper excavation or additional base material.
Clear written proposals reduce misunderstandings. A detailed scope should outline materials, base preparation approach, drainage strategy, and payment schedule. Transparent communication keeps a patio construction project on track and avoids unwanted surprises.
We approach projects through structured full project management so coordination between trades and timelines remains consistent from start to finish.
How to Evaluate Patio Contractors Before You Commit
Choosing among patio contractors requires more than comparing price lines. The goal is long-term value.
Use this checklist when reviewing options:
- Verify licenses and insurance coverage.
- Review a portfolio of completed local projects, such as those shown in our project gallery.
- Ask technical questions about excavation depth, base thickness, compaction methods, and drainage approach.
- Request a detailed written proposal outlining materials and scope.
- Clarify warranty coverage and what it includes.
- Observe communication style and responsiveness during early conversations.
Clear answers to technical questions signal experience. Vague responses often lead to problems later.
Homeowners in Shakopee and nearby communities benefit from scheduling a site visit before committing. An in-person evaluation allows us to assess slope, soil, and layout constraints directly. From there, we provide practical recommendations grounded in local conditions.
We keep conversations straightforward and focused on what fits the property. No pressure. No unnecessary upgrades. Just honest guidance and skilled construction backed by hands-on involvement from consultation through final walkthrough.
Those ready to discuss plans for a custom outdoor patio can reach out through our contact page to set up a consultation.